Hike Further, Feel Better: The Ultimate Guide to Insoles for Long-Distance Trekking

Optimize your trail experience with specialized hiking insoles that provide arch support, shock absorption and moisture management. Designed for uneven terrain and long distances to reduce foot fatigue and prevent blisters during backpacking or day hikes.
Hike Further, Feel Better: The Ultimate Guide to Insoles for Long-Distance Trekking
Table of Contents
- Introduction: Why Every Mile Matters
- The Science of Comfort: How Insoles Work
- Types of Insoles for Trekking: Finding Your Perfect Match
- Key Benefits: More Than Just Cushioning
- Choosing the Right Insole: A Step-by-Step Guide
- Integrating Insoles into Your Trekking System
- Care and Maintenance: Extending the Life of Your Insoles
- Expert Insights: What the Pros Say
- Frequently Asked Questions (FAQ)
- Conclusion: Your Next Step to Better Hiking
Introduction: Why Every Mile Matters
Long-distance trekking is a pursuit of endurance, connection with nature, and personal achievement. However, the difference between a triumphant summit photo and a painful, early retreat often lies not in your boots, but in what you put inside them. The right pair of hiking insoles can be the most transformative piece of gear in your backpack. This guide delves deep into the world of insoles, explaining how they function, why they are indispensable for long trails, and how to select and use them to hike further and feel better.
The Science of Comfort: How Insoles Work
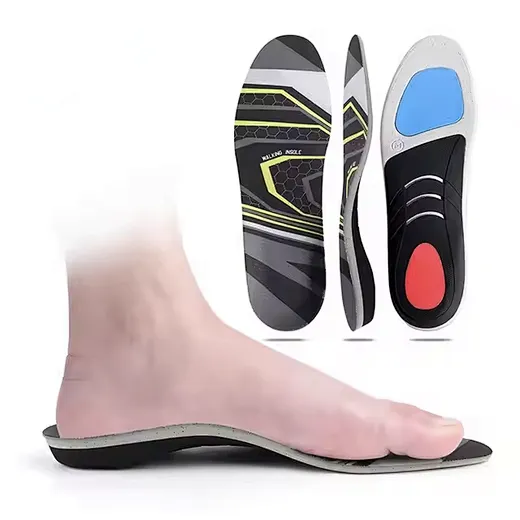
Insoles, or footbeds, are not merely extra padding. They are sophisticated biomechanical tools designed to interface between your foot and the boot.
The Impact of Repetitive Stress
Each step on a trek delivers a force of up to 2-3 times your body weight to your feet. Over 20,000 steps in a day, this repetitive stress accumulates, leading to fatigue, hot spots, and injuries.
Primary Functions of High-Performance Insoles
Shock Absorption: Quality insoles dissipate impact energy before it travels up your kinetic chain (ankles, knees, hips, back).
Arch Support and Alignment: They provide dynamic arch support to maintain the foot's natural posture, preventing overpronation or supination.
Pressure Distribution: By offering targeted cushioning in high-impact zones (heel, metatarsals), they prevent concentrated pressure points.
Stability and Control: A good insole cups the heel and supports the midfoot, enhancing stability on uneven terrain and reducing ankle roll risk.
Types of Insoles for Trekking: Finding Your Perfect Match
1. Cushioning Insoles
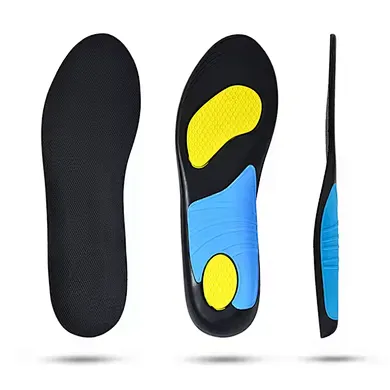
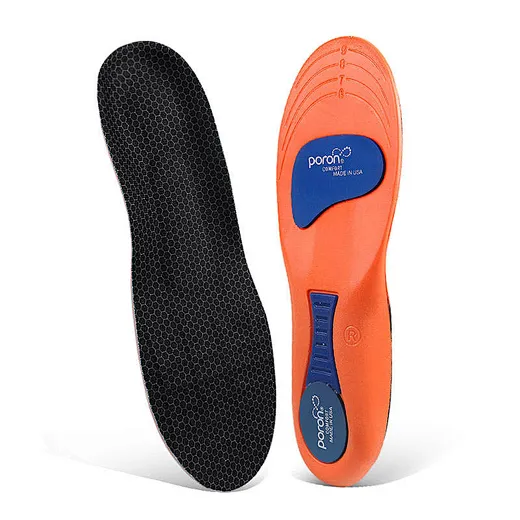
Made from materials like gel, foam, or EVA, these prioritize comfort and shock absorption. Ideal for hikers on well-maintained trails or those with joint sensitivity seeking all-day comfort.
2. Supportive/Rigid Insoles
Often constructed with a semi-rigid thermoplastic shell, these provide maximum arch support and motion control. Best for hikers with flat feet, overpronation, or those carrying heavy loads over technical terrain.
3. Heat-Moldable Custom Insoles
The gold standard for serious trekkers. These insoles can be heated and molded to the precise contours of your feet, offering a personalized fit that addresses unique biomechanical needs.
4. Replacement Insoles vs. Add-Ons
Most hiking boots come with generic, low-quality flat insoles. Replacing factory insoles is the first and most critical upgrade any hiker should make.


Key Benefits: More Than Just Cushioning
- Enhanced Endurance: By reducing muscle fatigue in the feet and legs, you conserve energy for more miles.
- Injury Prevention: Proper alignment mitigates risks of plantar fasciitis, Achilles tendonitis, and stress fractures.
- Improved Boot Fit: Insoles can take up volume, securing the heel and eliminating slippage, which is crucial for preventing blisters.
- Temperature and Moisture Management: Many premium insoles feature moisture-wicking top covers and antimicrobial treatments to keep feet drier and healthier.
Choosing the Right Insole: A Step-by-Step Guide
Step 1: Analyze Your Foot Type
Perform a simple wet test: wet your foot and step on a paper bag. See your arch imprint? High arches need cushioning; low/flat arches need support; neutral arches need a balanced insole.
Step 2: Consider Your Trekking Style
Are you a fast-and-light trail runner or a backpacker with a 50lb load? The required level of support and durability differs vastly. For heavy loads, prioritize supportive insoles with a rigid chassis.
Step 3: Match the Insole to Your Boot
Ensure the insole fits the shape and volume of your boot. Some may require trimming. A mountaineering boot needs a different insole than a lightweight trail shoe.
Step 4: Try and Test
Always try insoles with your hiking socks. Walk around the store or at home during a break-in period. Pay attention to any pressure points.
Integrating Insoles into Your Trekking System
Your insoles are part of a system: socks + insoles + boots. Wear your preferred hiking socks when fitting insoles. Break them in gradually on shorter walks before a major trek. Remember, the goal is optimal load distribution across your entire foot.
Care and Maintenance: Extending the Life of Your Insoles
To maintain performance, air them out after every hike. Hand wash with mild soap and lukewarm water; never machine wash or dry. Allow them to dry completely away from direct heat. Most high-quality insoles have a lifespan of 500-750 miles of trekking.
Expert Insights: What the Pros Say
"In my 20 years of guiding multi-week expeditions, I've seen more trips compromised by foot pain than by bad weather. The single most effective intervention is a proper insole. Many hikers invest in expensive boots but neglect the interface that actually supports their structure. For long-distance trekking, a custom-molded or high-support insole isn't a luxury—it's essential gear that directly impacts your ability to cover ground safely and enjoyably."
– Sarah Chen, Lead Guide & Podiatrist, Wilderness Medical Associates
Frequently Asked Questions (FAQ)
1. Can I use the same insoles in different pairs of boots?
It's possible if the boots are similar in type and volume, but not ideal. For optimal performance, dedicate a set of insoles to each primary pair of footwear. The insole molds to your foot and that specific boot's interior.
2. How often should I replace my hiking insoles?
Depending on use, every 6-12 months or 500-750 miles. Signs of replacement include visible compression/wear, loss of cushioning, or the return of foot pain you had previously eliminated.
3. Are expensive custom orthotics worth it for trekking?
For long-distance hikers, backpackers with pre-existing foot conditions, or those spending months on trail, custom orthotics can be a game-changing investment. For casual hikers, high-quality off-the-shelf insoles from reputable brands often suffice.
4. Do I need different insoles for summer and winter hiking?
Possibly. Winter hiking with thick insulated socks may reduce boot volume, requiring a thinner insole. Some hikers prefer moisture-wicking insoles for summer and thermally reflective ones for winter.
5. Can insoles really prevent blisters?
Absolutely. A primary cause of blisters is friction from foot movement inside the boot. Insoles that provide a secure heel lock and full-foot contact minimize this movement, drastically reducing blister formation.
Conclusion: Your Next Step to Better Hiking
The journey to longer, more comfortable treks begins from the ground up. By understanding the critical role of hiking insoles, you empower yourself to make an informed choice that directly impacts your performance and enjoyment. Don't settle for the flimsy footbeds that came with your boots. Invest in a pair designed for the demands of long-distance trekking. Your feet—and every joint connected to them—will thank you for miles and miles to come. Remember, the goal is not just to reach the destination, but to feel better when you get there.


Heavy Pack vs. Light Pack: Choosing the Right Insole Support for Your Hike
Stand All Day in Comfort: The Ultimate Guide to Anti-Fatigue Insoles for Professionals